Vape Tank Leaking? Here’s Why It Happens and How to Fix It for Good
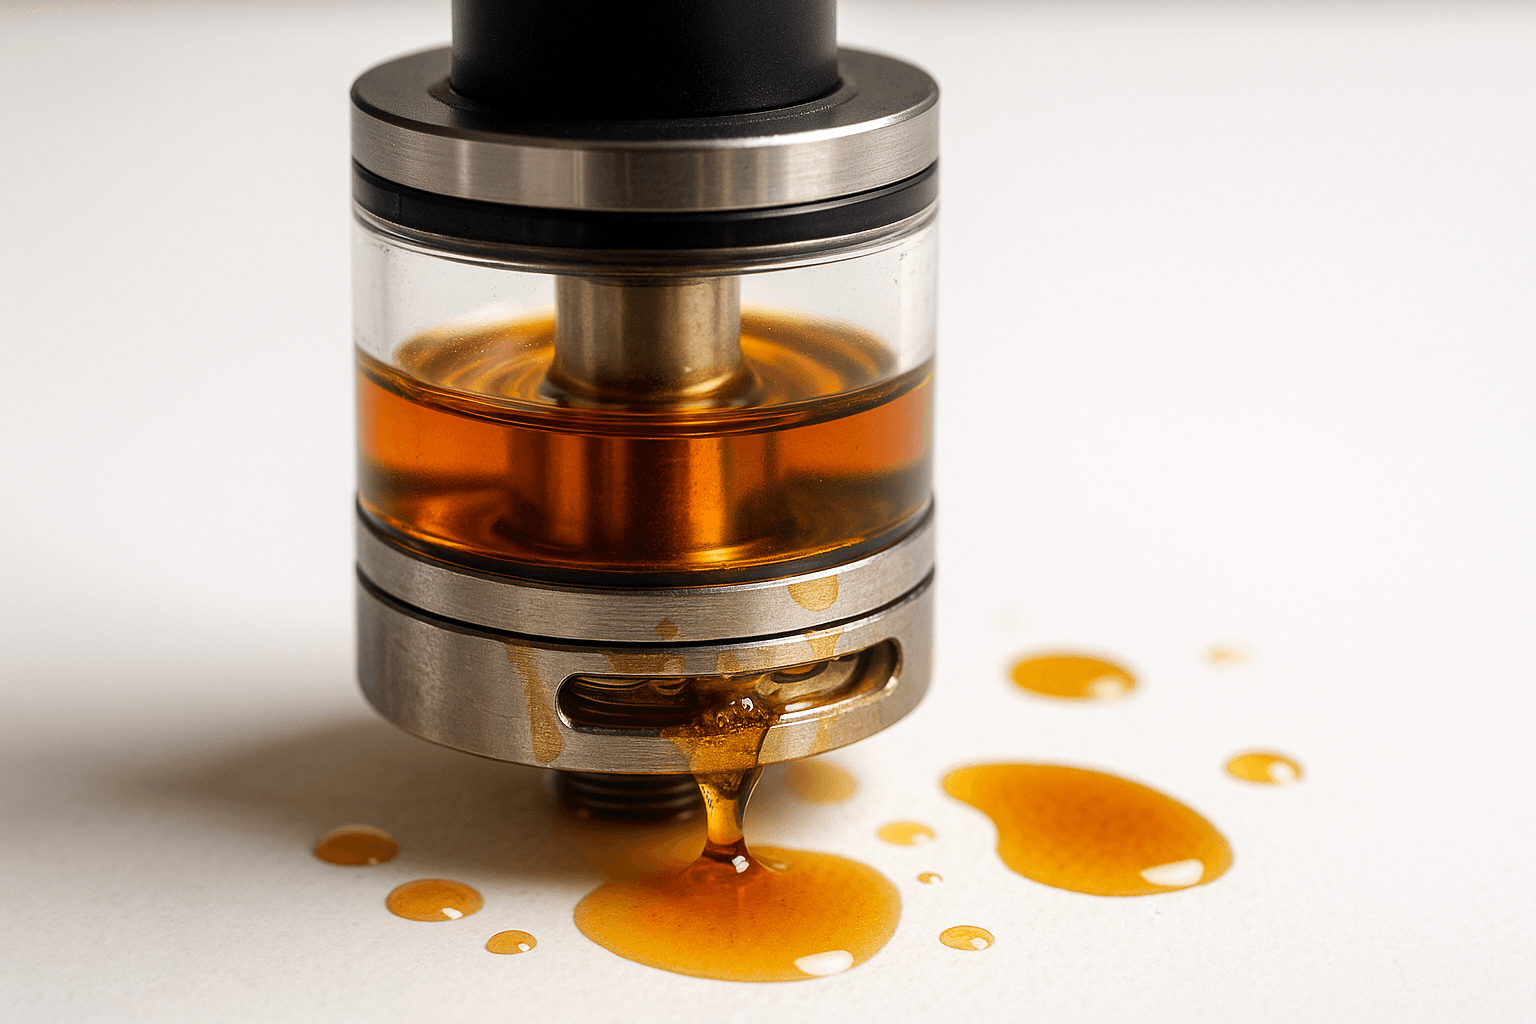
A leaking vape tank is one of the most annoying issues for vapers. It wastes juice, creates a mess, and ruins the whole experience. The good news? Most leaks are easy to fix—or prevent entirely—with just a bit of know-how.
This guide will walk you through the most common reasons why vape tanks leak, how to troubleshoot them, and the best preventative steps you can take. Whether you're new to vaping or a seasoned pro, this info will help keep your tank dry and your vape sessions smooth.
Quick Navigation
- Understanding the Causes
- Troubleshooting Leaks
- Preventative Measures
- TL;DR: Quick Fixes for Vape Tank Leaks
- Make Every Vape Leak-Free
Understanding the Causes
There are several common reasons your vape tank might be leaking. Let’s break them down one by one:
1. Incorrect Filling
One of the most common causes of vape tank leaks is improper filling technique. Overfilling your tank or letting e-liquid enter the central airflow tube (chimney) can lead to leaks.
➡️ Tip: Always fill your tank at a slight angle and avoid the center tube.
2. Coil Issues
Your coil plays a vital role in sealing the tank. A worn-out coil or one with damaged O-rings can cause e-liquid to escape through small gaps. Improperly installed coils can also fail to seal the tank fully.
➡️ Tip: Always hand-tighten coils securely but avoid over-tightening.
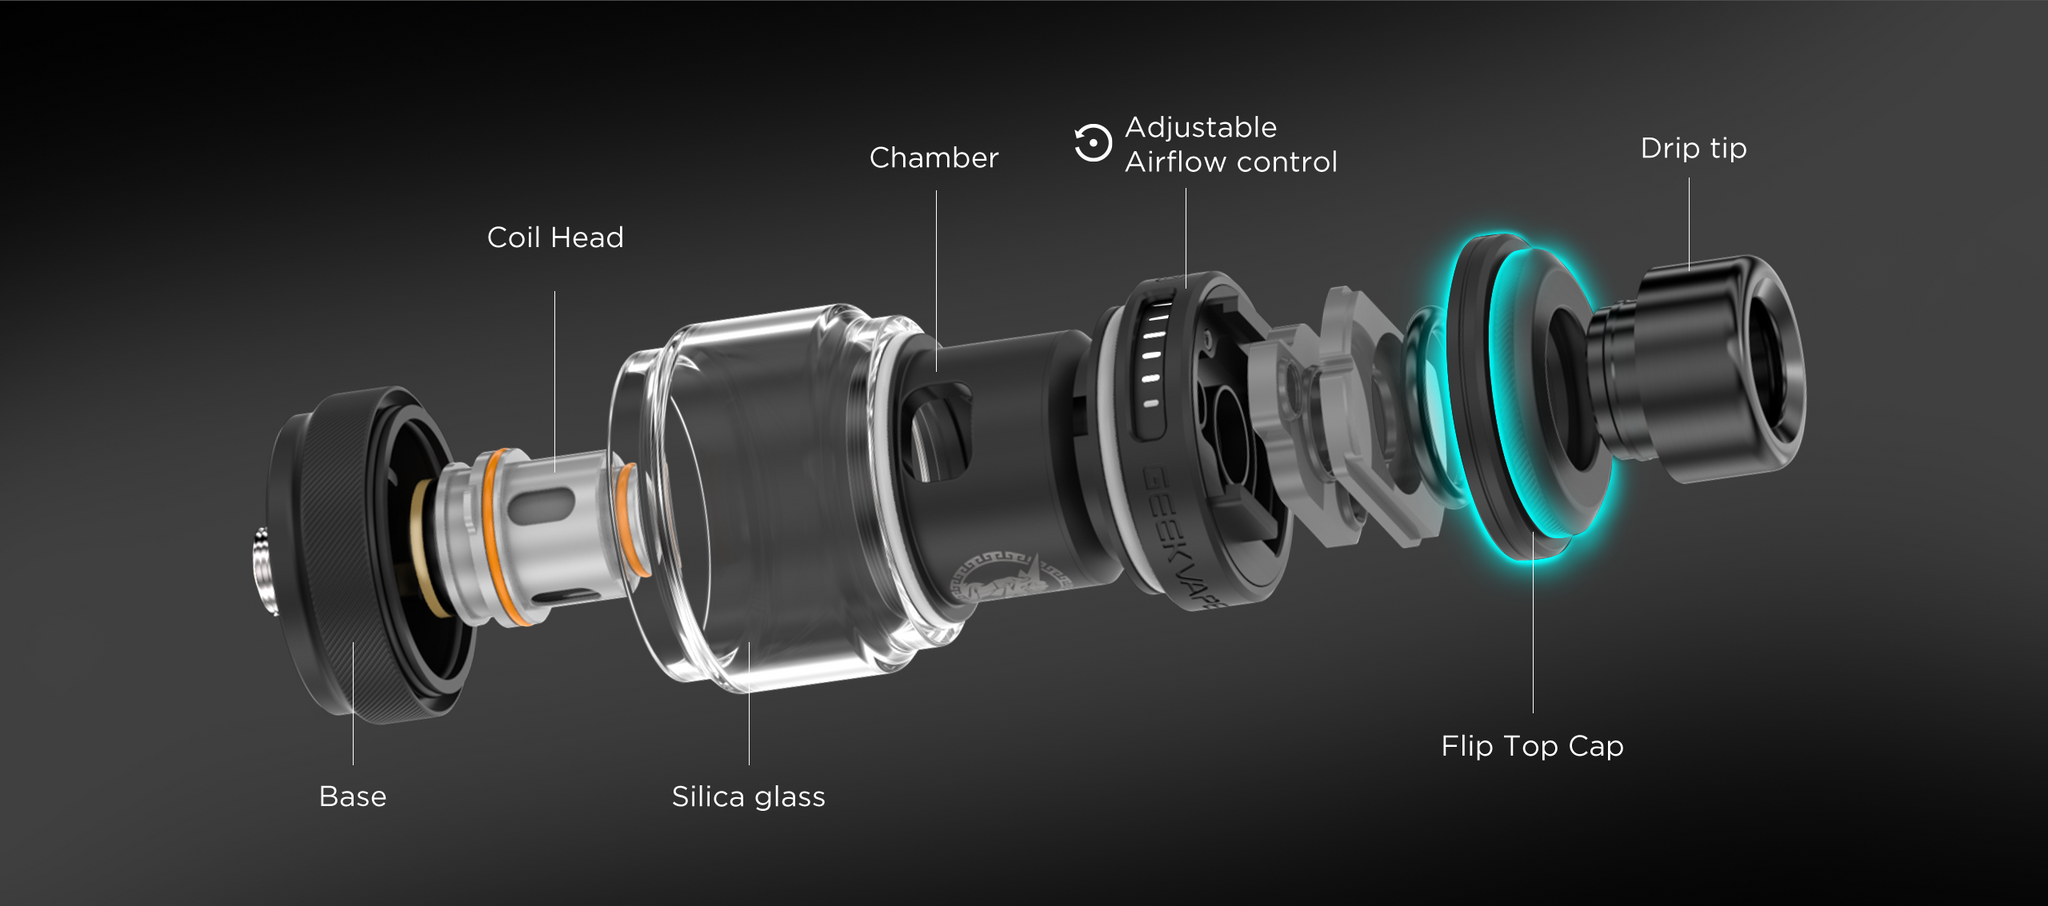
3. Tank Assembly Problems
Every component in your tank must be snugly connected. Loose glass, base plates, or top caps can allow e-liquid to seep out. Worn-out gaskets or O-rings are common culprits, too.
➡️ Tip: Check your seals regularly and replace any visibly damaged parts.
4. E-Liquid Type
Thinner e-liquids with a high-PG ratio are more prone to leaking, especially in tanks with wide airflow. Thicker, high-VG juices are better suited for sub-ohm devices but may not work well in all tanks.
➡️ Tip: Match your e-liquid VG/PG ratio with your coil and device specs.
5. Air Pressure
Sudden temperature changes or elevation shifts can cause internal tank pressure to increase, pushing e-liquid out through the airflow vents.
➡️ Tip: Don’t leave your vape in hot cars or take it on a plane without emptying the tank.
Troubleshooting Vape Tank Leaks
Dealing with a leaky vape tank? Don’t stress—most leaks can be resolved with a few quick checks. This guide walks you through clear, step-by-step solutions to identify the issue and fix it fast, so you can enjoy a smooth, mess-free vaping experience.
1. Check and Replace the Coil
- Remove the tank and carefully inspect the coil for signs of wear, looseness, or damaged O-rings.
- Tighten the coil securely, or replace it if needed.
- Pro tip: Coils typically last 1–2 weeks, depending on your usage.
2. Use Proper Filling Techniques
- Always fill your tank below the maximum fill line to prevent overflow.
- Avoid letting e-liquid drip into the chimney section.
- Hold your vape at a slight tilt while filling for better control.
- After filling, close the cap firmly but avoid over-tightening.
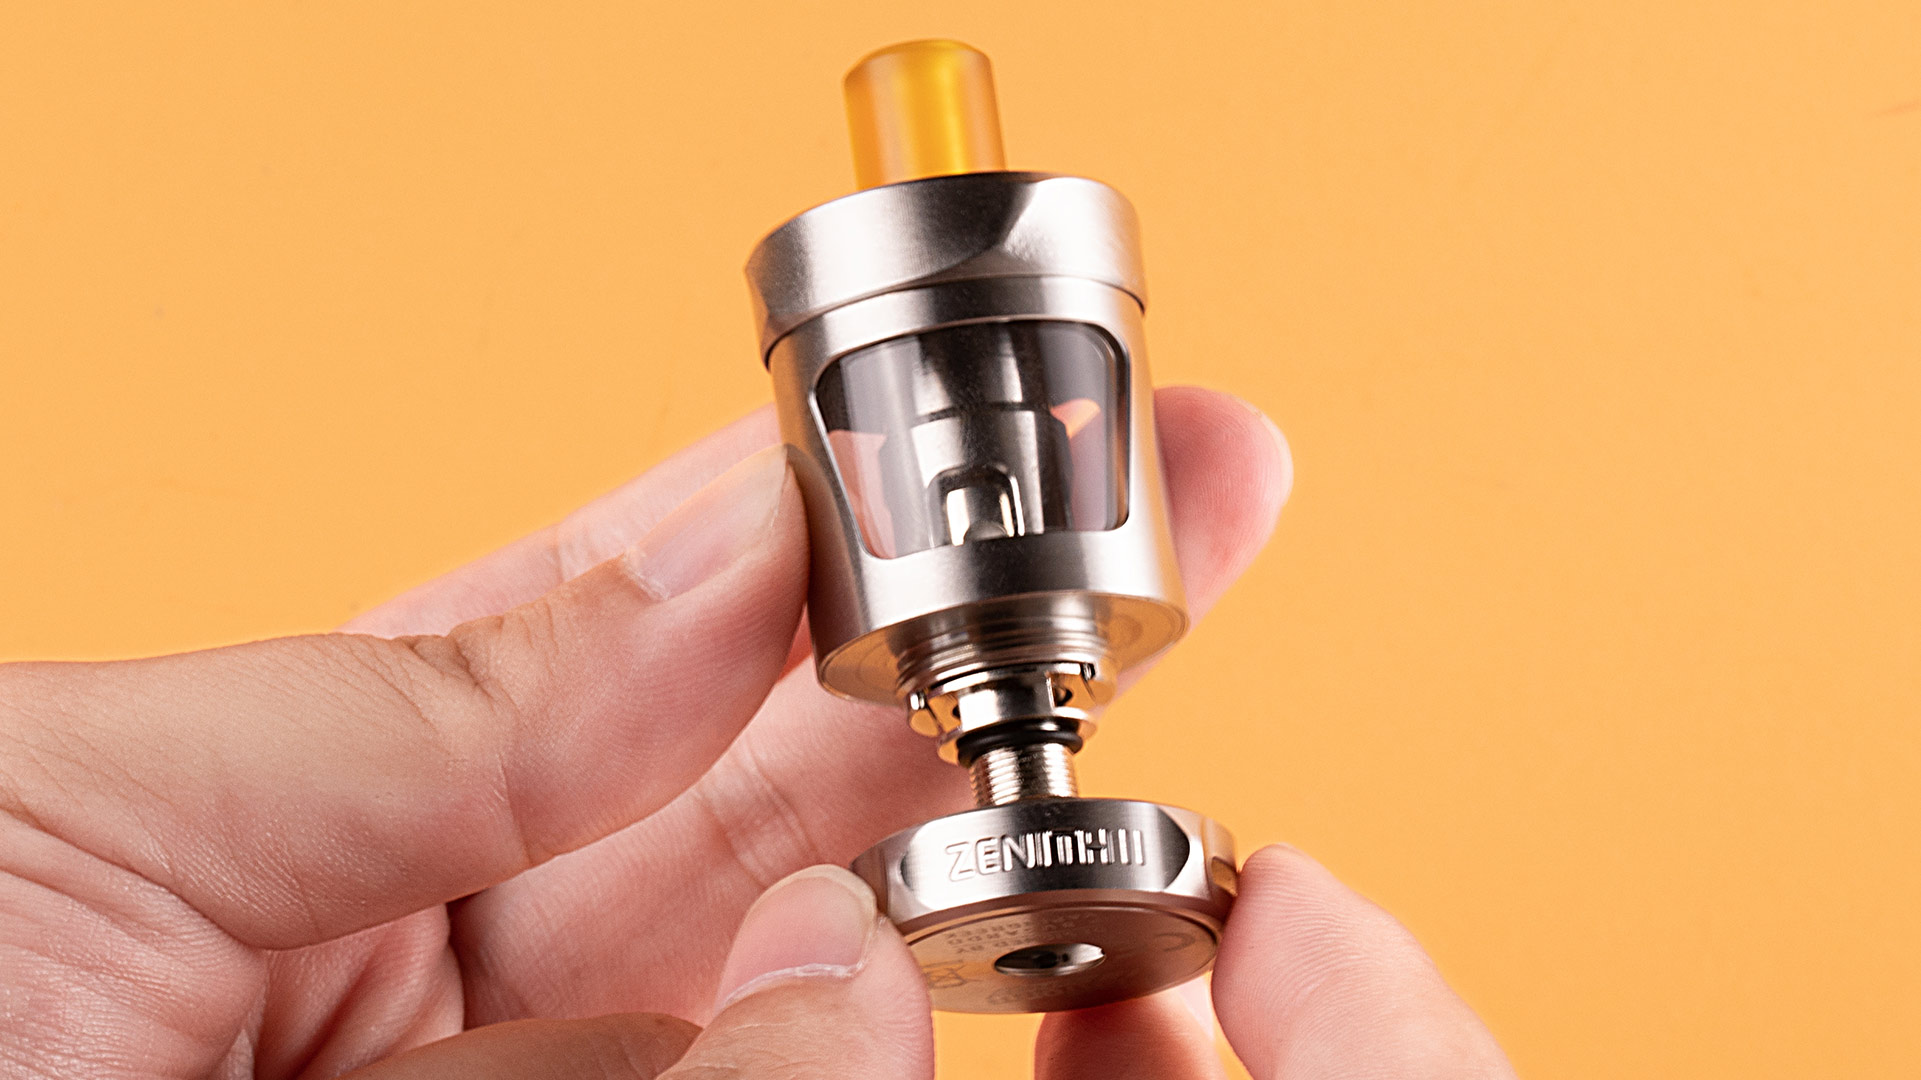
3. Inspect Seals and Connections
- Disassemble the tank and examine all O-rings, seals, and threading for damage.
- Ensure all connections are snug but not overly tightened, as this can cause wear.
- Replace any damaged seals or gaskets with compatible replacements.
4. Adjust Airflow Settings
- If your airflow vents are open too wide, especially with thinner e-liquids, leakage can occur.
- Slightly tighten the airflow to improve vaporization and reduce the risk of leaks.
➡️ Tip: Start with a medium airflow setting and adjust it based on the thickness of your e-liquid and your chosen wattage for optimal performance.
By following these steps, you can keep leaks at bay and maintain a hassle-free vaping experience!
Preventative Measures
Simple steps to keep your vape in top condition, avoid leaks, and ensure optimal performance.
1. Regular Maintenance
-
Clean your tank with warm water every few days.
-
Let parts dry completely before reassembly.
-
Check for e-liquid residue that could interfere with seals.
2. Choosing the Right E-Liquid
-
For sub-ohm tanks: use 70/30 VG/PG.
-
For higher resistance tanks: use 50/50 VG/PG.
-
Check your device manual or consult a vape shop if you’re unsure.
3. Storing Your Vape Properly
-
Always store upright.
-
Don’t leave it in direct sunlight or hot environments.
-
If unused for long periods, empty the tank to prevent leaks from air pressure shifts.
➡️ Bonus Tip: Carry your device in a case to avoid accidental tank damage on the go.
TL;DR: Quick Fixes for Vape Tank Leaks
- ✔ Don’t overfill your tank.
- ✔ Keep juice out of the chimney.
- ✔ Replace worn or damaged coils and O-rings.
- ✔ Match your e-liquid’s VG/PG ratio with your tank and coil.
- ✔ Adjust airflow settings and store your vape upright.
- ✔ Clean and maintain your tank regularly.
Make Every Vape Leak-Free
A leaking vape tank can be a hassle, but it’s a problem with simple solutions. By understanding the causes and applying these troubleshooting tips and preventative measures, you’ll enjoy a cleaner, more satisfying vaping experience.
Vaping is about enjoyment, and dealing with leaks shouldn’t distract from that. Pay attention to your device maintenance, choose the right e-liquids, and always handle your vape with care for the best results.
💬 Got leak-proof tips of your own? Drop them in the comments—we’d love to feature your advice!
📩 Want more vape guides like this? Subscribe to our newsletter for the latest tips, reviews, and exclusive deals.