Ultimate Guide to Vape Tank Maintenance: Keep Every Puff Perfect
Want to make every vape hit as smooth and flavorful as the first? It all starts with a clean tank. Beyond the shine, tank maintenance protects flavor, extends device life, and keeps leaks at bay. Build-up from e-liquids, residue, and even dust can affect flavor, vapor quality, and the lifespan of your device. With just a bit of regular care, you can avoid burnt tastes, unpleasant leaks, and even save money over time. This guide will take you through everything you need to know about vape tank maintenance, including how often to clean, essential tools, a step-by-step cleaning guide, preventive tips, and solutions for common tank problems.
Quick Navigation
- Why Cleaning Your Vape Tank Matters
- How Often Should You Clean Your Vape Tank?
- Essential Tools for Vape Tank Maintenance
- How to Clean Your Vape Tank (Step-by-Step)
- Vape Tank Maintenance Tips for Long-Term Performance
- Troubleshooting Common Vape Tank Issues
- Final Thoughts: Better Vaping Starts with a Clean Tank
Why Cleaning Your Vape Tank Matters
A clean vape tank delivers the pure, full flavor of your e-liquid. It also extends the life of your tank and coils, helps prevent malfunctions like leaking, and creates a safer environment by reducing the risk of bacteria or mold. Without regular maintenance, residue builds up, causing gunked-up coils, muted flavors, burnt hits, or even clogs. Think of your vape tank as a kitchen tool; you wouldn’t prepare food with dirty utensils, so why vape with a dirty tank?
How Often Should You Clean Your Vape Tank?
The right cleaning schedule depends on how often you vape, what types of e-liquids you use, and your device. Here’s a general guideline:
Cleaning Schedule Quick Guide
| Situation | Action |
|---|---|
| Changing flavors | Quick rinse |
| Daily vaping | Deep clean weekly |
| Sweet/dark juices | Clean more frequently |
| Burnt or odd taste | Clean immediately & replace coil |
Regular cleaning ensures each new e-liquid tastes fresh and prevents lingering flavors from mixing.
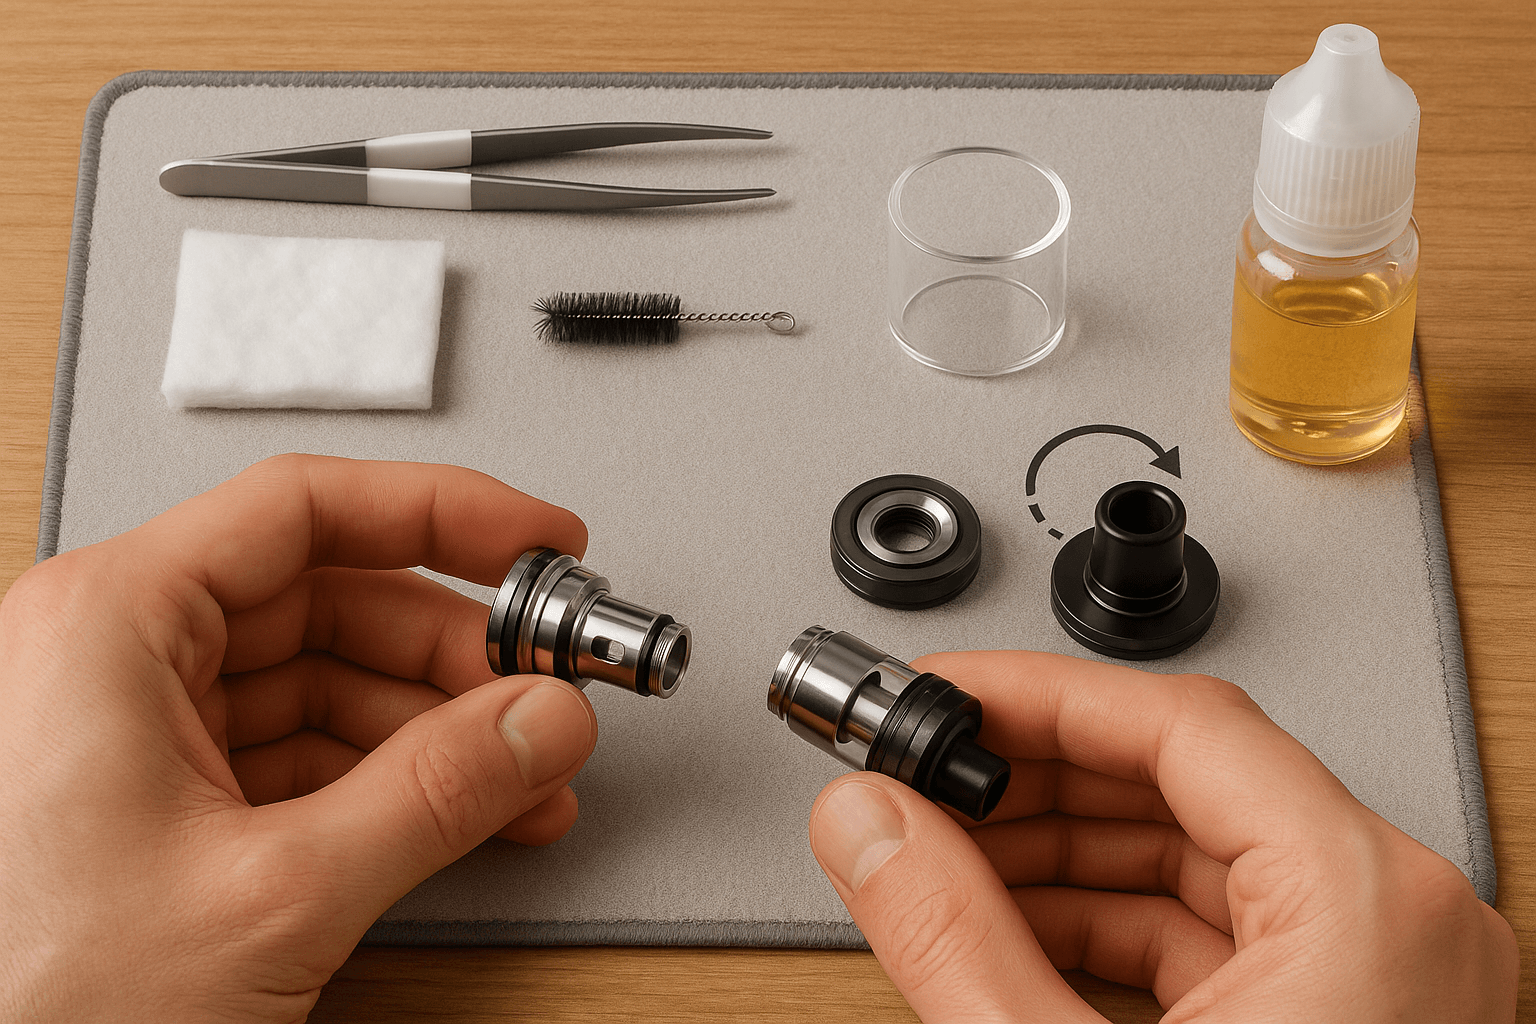
Essential Tools for Vape Tank Maintenance
You don’t need a lot of fancy equipment to keep your vape tank in top shape. Here’s what you’ll need:
-
Soft, lint-free cloths or paper towels
-
Cotton swabs (Q-tips)
-
Warm water (distilled is best)
-
A small bowl
-
Mild dish soap (for deep cleaning)
-
An old toothbrush or small cleaning brush
-
Rubbing alcohol or vodka (optional, for stubborn residue)
-
Extra O-rings or gaskets (in case any need replacing)
Pro Tip: Always have extra coils and O-rings on hand—especially if you vape daily. Quick replacements prevent downtime.
How to Clean Your Vape Tank (Step-by-Step)
Step 1: Disassemble Your Vape Tank
-
Detach the tank from the device: Remove it from the battery/mod.
-
Remove the coil: Unscrew the coil head from the base. Set aside if you plan to reuse, or discard if it’s burned out.
-
Take apart all pieces: Separate the mouthpiece (drip tip), glass tube, and any removable parts. Check your device manual if unsure.
Step 2: Clean Each Component
For a quick rinse (between flavor changes):
-
Hold each tank component under warm running water.
-
Use a soft cloth or paper towel to gently wipe away residue.
-
Set parts aside on a towel to air-dry.
For a deep clean (weekly/biweekly):
-
Fill a small bowl with warm water and a drop of mild dish soap.
-
Place the tank parts (except coil!) in the solution and soak for 10–15 minutes.
-
Use a toothbrush or cotton swab to gently scrub away stubborn grime.
-
Rinse each part thoroughly under warm (preferably distilled) water.
-
For lingering odors or residue, soak parts in vodka or rubbing alcohol for a few minutes, then rinse again.
-
Dry each component with a lint-free cloth or air-dry on a paper towel.
⛔ Do not submerge the coil. Coils contain delicate wicking material that can be damaged by water or alcohol.
Step 3: Dry Thoroughly
Moisture inside the tank can dilute e-liquid and cause leaks or spitback. Pat every part dry with a clean cloth or paper towel and allow them to air-dry for at least 10–15 minutes before reassembly.
Step 4: Reassemble Your Tank
-
Inspect O-rings and gaskets for wear or damage; replace if needed.
-
Carefully reassemble all parts in the correct order.
-
Screw the coil back in place (or insert a new one).
-
Fill the tank with your favorite e-liquid.
-
Reattach the tank to your device and take a few dry pulls (without firing) to help saturate the coil.
Vape Tank Maintenance Tips for Long-Term Performance
-
Avoid cross-threading: When screwing parts back together, start slowly to avoid damaging threads.
-
Don’t overfill the tank: This leads to leaks and flooding.
-
Replace coils regularly: Old or burnt coils can dull flavor and reduce vapor quality. Swapping them out every 1–2 weeks is typical, but knowing when to replace your vape coil depends on usage and performance.
-
Use clean, high-quality e-liquids: Cheaper juices often contain excess sweeteners or additives that lead to faster coil buildup. Opting for best e-liquids that won’t gunk up your tank can help maintain cleaner coils and better performance.
-
Check for leaks: Regularly inspect seals and connections. Replace any torn or loose O-rings immediately.
-
Store upright: This helps prevent leaks and keeps your tank clean.
Pro Tip: A well-maintained tank reduces downtime, cuts down on replacement costs, and maximizes every vaping session.
Troubleshooting Common Vape Tank Issues
Burnt Taste
-
Problem: A burnt hit is harsh and tastes unpleasant.
-
Solution: Replace the coil, clean your tank, and ensure the wick is fully saturated before use.
Leaking
-
Problem: E-liquid seeping out of the tank or air holes.
-
Solution: Check for overfilling, damaged O-rings, or loose connections. Make sure all parts are tightly secured.
Gurgling or Spitback
-
Problem: Loud bubbling sounds or e-liquid spitting into your mouth.
-
Solution: Clean your tank, remove excess liquid, and avoid over-priming or overfilling.
Muted Flavor
-
Problem: E-liquid tastes dull or odd.
-
Solution: Clean your tank, use a fresh coil, and check for residue buildup.
Hard Draw
-
Problem: Hard to pull vapor through the mouthpiece.
-
Solution: Disassemble and clean the tank to remove any blockages or buildup.
Most problems can be fixed with regular cleaning and maintenance. If issues persist, check your manufacturer’s instructions or contact customer support for guidance.
Final Thoughts: Better Vaping Starts with a Clean Tank
A few minutes of regular maintenance can mean the difference between a burnt hit and a smooth, flavor-packed session. By setting a cleaning routine and keeping the right tools on hand, you're not just extending your vape’s lifespan—you’re upgrading every puff.
💨 Want cleaner clouds and better flavor every time?
👉 Subscribe to our newsletter for pro tips, insider updates, and exclusive offers delivered straight to your inbox!
💬 Got a cleaning hack or question? Drop a comment below—we’d love to hear from you and keep the vape conversation going!