DIY Coils vs. Pre-Built Coils: Which Should Vapers Choose?
What type of vaper are you—cloud chaser, flavor enthusiast, or curious newbie? Vape coils are at the heart of every satisfying draw, but selecting between DIY coils and pre-built coils can feel a little overwhelming. Are you looking for customization and cost savings, or do you simply want convenience and consistency? This post will explore the key differences, pros and cons of each option and provide a step-by-step installation guide so you can make the choice that matches your vaping style.
Quick Navigation
- What Are DIY Coils?
- What Are Pre-Built Coils?
- DIY Coils: Pros and Cons
- Pre-Built Coils: Pros and Cons
- Factors to Consider When Choosing
- Step-by-Step Guide to Installing Coils
- Quick Tip
- Making the Right Coil Choice for Your Vape Journey
What Are DIY Coils?
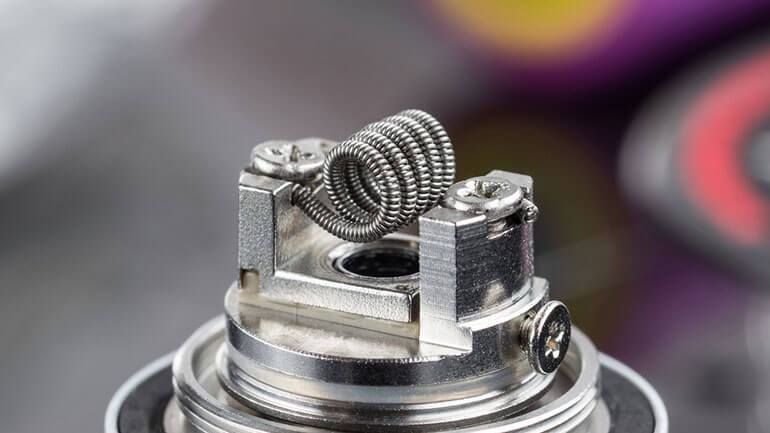
DIY coils, or "do-it-yourself" coils, are handmade wire coils that you build and install into your own rebuildable atomizer (RBA, RDA, or RTA). Vapers craft these using resistance wire (like Kanthal, Nichrome, or Stainless Steel), winding it around a rod or a coil jig. Once shaped, users install the coil into the deck, attach the leads, trim excess wire, and thread cotton through the center.
This approach gives users complete control over resistance (ohms), number of wraps, coil diameter, and the amount of cotton used. It’s popular among hobbyists, tinkerers, and those who prefer a truly custom vaping experience.
What Are Pre-Built Coils?
Pre-built coils are professionally manufactured and ready to use straight out of the box. These can be as simple as basic single-wire coils or advanced claptons, aliens, and mesh options. Simply open the pack, insert the coil into your RDA/RTA, and you’re practically set.
Many pre-built coils arrive already cleaned, oxidized, and bent at the leads for easy fitting. This appeals to users who want reliable performance with minimal effort. For those using tanks with coil heads (sub-ohm tanks), pre-built coil heads provide a full replacement unit, including the coil and cotton in a casing.
DIY Coils: Pros and Cons
Pros of DIY Coils
-
Customization: Choose your wire type, coil style, wrap count, and resistance for a highly personalized experience.
-
Cost savings: Raw wire and cotton are much cheaper than buying replacement heads over time.
-
Performance: DIY coils can deliver better cloud production and nuanced flavor if built well.
-
Skill Building: Crafting and installing your own coils enhances your understanding of vaping hardware.
Cons of DIY Coils
-
Time-consuming: Wrapping, installing, and adjusting coils takes patience and practice.
-
Steep learning curve: Building your own coils requires a good grasp of coil maintenance and replacement practices, or you risk performance issues over time.
-
Equipment needed: You’ll need tools like wire cutters, coil jigs, tweezers, and ohm meters for safety.
-
Consistency: Getting the “perfect” coil every time can be tricky, even with experience.
Pre-Built Coils: Pros and Cons
Pros of Pre-Built Coils
-
Convenience: No winding, minimal prep, and quick installation save time and hassle.
-
Consistency: Professional quality control means repeatable, reliable performance.
-
Variety: Pre-built options include everything from simple round wire to intricate exotic builds and mesh.
-
Beginner-friendly: Accessible for vapers of all experience levels.
Cons of Pre-Built Coils
-
Higher cost: Factory-made coils, especially for sub-ohm tanks, cost more per unit than raw wire.
-
Less customization: Your choices are confined to what’s available in stores or online.
-
Waste: Disposable coil heads can generate more environmental waste than DIY options.
-
Limited performance tweaks: It’s harder to “dial in” to your unique preferences.
Factors to Consider When Choosing
The choice between DIY and pre-built coils often comes down to your priorities, budget, and experience level. Consider:
-
Skill level: Understanding Ohm’s Law is key to safe and effective DIY coil building.
-
Time: Do you enjoy tinkering and experimenting, or do you want to vape with minimal prep?
-
Budget: Looking to minimize ongoing expenses by building your own, or are you willing to pay for plug-and-play?
-
Vaping style: Pursuing maximum clouds, optimal flavor, or a hassle-free setup?
-
Device compatibility: Some atomizers and tanks only work with specific types of coils or heads.
Maintenance: DIY coils can usually be cleaned and rewicked multiple times, while pre-built heads are tossed after use.
Ultimately, there’s no single right answer. Many vapers switch between DIY and pre-built coils depending on their routine or mood.
Step-by-Step Guide to Installing Coils
Whether you build your coils or buy pre-made ones, proper installation ensures safety and optimal performance. Here's a basic guide for rebuildable atomizers:
| Step | Action | Details |
|---|---|---|
| 1. Gather Your Tools | Prepare all necessary items. | Coils (DIY or pre-built), wire cutters, ceramic tweezers, coil jig or small screwdriver, ohm reader or regulated mod, and organic cotton. |
| 2. Prepare Your Coil | Customize or inspect your coil. | For DIY coils, wrap to desired resistance. For pre-built, check for deformities and pre-bend leads. |
| 3. Install the Coil | Place the coil into the deck. | Insert leads into post holes, center the coil above airflow, and tighten screws. Adjust with ceramic tweezers if needed. |
| 4. Trim Excess Leads | Remove extra wire. | Carefully snip the ends close to the posts to prevent shorts. |
| 5. Test Resistance | Check the coil’s resistance. | Use an ohm reader or regulated mod to ensure correct resistance and no shorts. |
| 6. Dry Burn and Adjust | Clean and fix hotspots. | Pulse the coil at low wattage until it glows evenly from the center. Adjust for any uneven heating. |
| 7. Wick the Coil | Add cotton. | Cut a strip slightly thicker than the coil's diameter. Thread it snugly, trim, fluff, and position ends properly. |
| 8. Prime and Assemble | Saturate and test. | Drip e-liquid onto the wick. Lightly pulse to ensure even vaporization. |
| 9. Reassemble and Fill | Final setup. | Reassemble the atomizer, fill the tank (if applicable), and start vaping! |
Quick Tip
When breaking in a coil, always begin at lower wattages, then gradually increase—similar to wattage tuning for better flavor and lifespan.
Making the Right Coil Choice for Your Vape Journey
Choosing between DIY coils and pre-built coils depends on your lifestyle, goals, and vaping preferences. DIY coils are perfect for hobbyists who love customization, want to save money, and enjoy hands-on tinkering. Pre-built coils are ideal for those prioritizing ease, speed, and consistency.
Don’t be afraid to experiment! Try both approaches and discover what delivers the ultimate vaping experience for you. Remember, a happy vape starts with the right coil for your routine and curiosity!
Want to stay ahead of vaping trends and get exclusive tips? Subscribe to our newsletter today!
Got thoughts or questions? Join the conversation in our comment section and connect with other vapers in our community forums. Stay safe and vape smart!