Building a Dual-Coil Setup: What to Know Before You Start
Double the Coils, Double the Power—But Only If You Build It Right
Thinking about upgrading to a dual-coil setup? Great choice—if you're chasing bigger clouds, bolder flavor, and faster ramp-up times, dual coils deliver in every category. But more power means more responsibility. Without proper planning, tools, and safety knowledge, your build could go from impressive to dangerous in seconds.
This guide breaks down everything you need to know to safely and successfully build your first dual-coil configuration—from understanding resistance to mastering the tools and avoiding common pitfalls. Whether you're new to building or just refining your skills, this is your blueprint for better performance without compromising safety.
Quick Navigation
- Why Go Dual-Coil? The Performance Boost Explained
- Ohm's Law + Dual-Coils = Essential Math
- Tools & Materials You'll Need
- Step-by-Step: How to Build a Dual-Coil Setup
- Critical Safety Reminders
- Troubleshooting Tips
- Advanced Techniques for Next-Level Performance
- Maintenance Monitoring
-
Take Your Build Skills to the Next Level
Why Go Dual-Coil? The Performance Boost Explained
What Makes Dual-Coils Better Than Singles?
-
More vapor production – Two coils vaporize more e-liquid at once
-
Richer flavor – Increased surface area extracts deeper flavor profiles
-
Faster heat-up – Dual coils ramp up quicker, providing instant performance
-
Improved airflow – Balanced air movement enhances vapor density and consistency
The Trade-Off: Power vs. Efficiency
While dual coils outperform single-coil builds in most categories, they also:
-
Drain batteries faster
-
Generate more heat
-
Require careful resistance and power planning
Ohm's Law + Dual-Coils = Essential Math
Know the Rule Before You Build
Ohm's Law: V = I × R (Voltage = Current × Resistance)
In mech or unregulated mods, YOU control the current and resistance. Mistakes can be dangerous—know your math.
Dual-Coil Resistance: Half the Ohms
When wired in parallel, your total resistance cuts in half:
-
2 × 0.5Ω coils = 0.25Ω total resistance
-
2 × 1.0Ω coils = 0.5Ω total resistance
Always use an ohm meter before firing your build. Safety first—no exceptions.
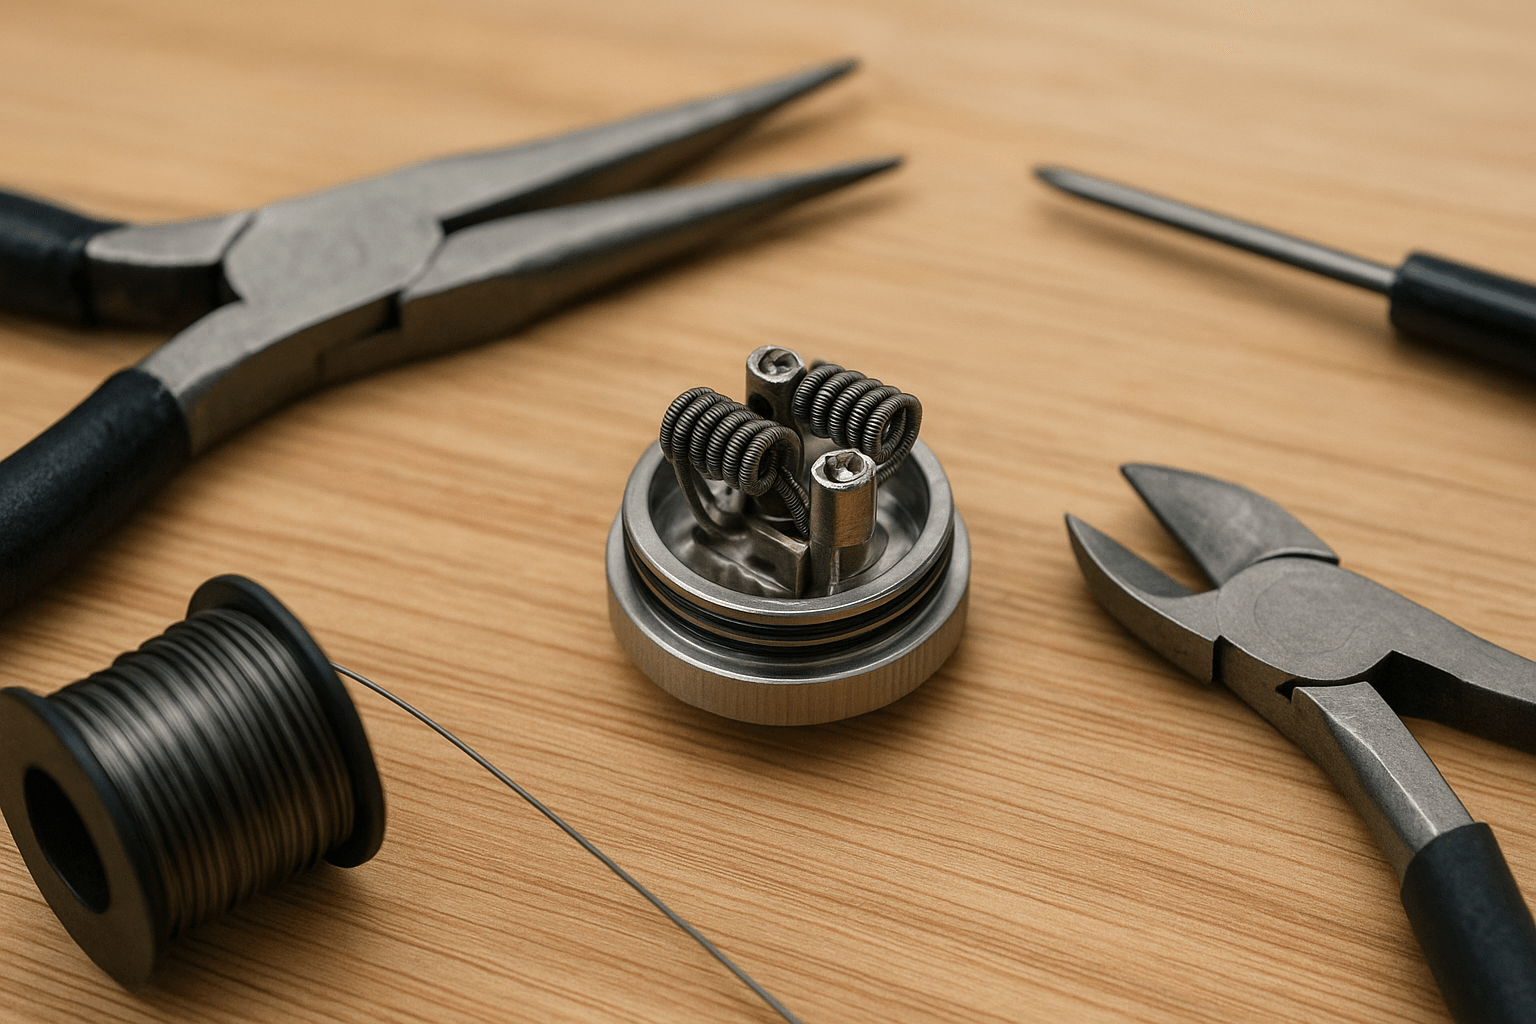
Tools & Materials You'll Need
Must-Have Tools for a Dual-Coil Build
-
Coil building kit (cutters, screwdrivers)
-
Ohm meter or regulated mod for resistance testing
-
Ceramic tweezers (safe for pulsing and pinching coils)
-
Wire (Kanthal, SS316L, Nichrome)
-
Organic cotton
-
Coil jig or drill bit (2.5mm–3mm ideal)
Choosing Your Wire
-
Kanthal A1 – Stable, beginner-friendly, power mode only
-
Stainless Steel 316L – Works in both power and temp control modes
-
Nichrome (Ni80) – Fast ramp-up, slightly lower resistance
Use 24–26 AWG wire for dual-coil builds—thick enough for stability, thin enough for heat efficiency.
Step-by-Step: How to Build a Dual-Coil Setup
Step 1: Winding Your Coils
-
Cut equal lengths of wire
-
Wrap coils on a jig (same diameter and number of wraps)
-
Check that both coils are visually identical
Step 2: Installing the Coils
-
Center both coils on the deck
-
Tighten post screws evenly
-
Make sure coils don't touch each other or the deck
-
Pulse briefly at low wattage to test for shorts
Step 3: Adjusting the Coils
-
Use ceramic tweezers to squeeze out hot spots
-
Pulse and adjust until both coils heat evenly from the inside out
-
Do a final resistance check
Step 4: Wicking the Coils
-
Cut enough cotton for a snug fit
-
Thread evenly through each coil
-
Trim tails to sit lightly in the juice well
-
Fluff cotton ends for better saturation
Critical Safety Reminders
Battery Safety First
-
Use high-drain batteries (minimum 20A CDR)
-
Replace worn or damaged batteries
-
Never ignore battery warmth or swelling
-
Use external chargers for reliability
Avoid Short Circuits
-
Confirm coils aren't touching metal parts
-
Secure all screws
-
Test resistance before use—every time
Troubleshooting Tips
Fixing Hotspots
-
Pulse at low wattage
-
Pinch coils with ceramic tweezers
-
Check leg placement and spacing
Solving Uneven Heating
-
Ensure coils are the same resistance
-
Balance airflow across both coils
-
Tighten all screws and connections
-
If problems persist—rebuild from scratch
Advanced Techniques for Next-Level Performance
Coil Types to Explore
-
Clapton coils – Thicker wire wrapped with thinner wire for max flavor
-
Twisted wire – Two wires twisted together for low resistance
-
Parallel coils – Two wires side-by-side for faster heating
Fine-Tuning Your Setup
-
Experiment with airflow control
-
Adjust wicking density for better juice flow
-
Find your ideal wattage range
-
Monitor coil lifespan—replace when flavor drops or resistance changes
Maintenance & Monitoring
-
Clean coils weekly to remove gunk
-
Replace cotton often for fresh flavor
-
Check resistance monthly for fluctuations
-
Inspect battery contacts regularly
Stop & Rebuild If You Notice:
-
Batteries getting hot
-
Jumping resistance readings
-
Burnt or dry hits
-
Your device overheating
Take Your Build Skills to the Next Level
Building dual coils takes time, but once you master the process, the payoff is huge: richer flavor, massive vapor, and total customization. Always keep a detailed record of your successful builds—note your wire type, coil size, resistance, and wick setup so you can replicate (or improve) each time.
Your Build Starts Now—But Safety Comes First
Gather your tools, prep your deck, and take your time with each step. The dual-coil experience is incredibly rewarding when done right—and safety is what makes that possible.
Have Questions or Want to Share Your Setup?
Drop a comment below—our team and community are here to help!
Want more tutorials and advanced coil-building tips? Join our newsletter to get expert content straight to your inbox.